Few things are more frustrating in the kitchen than reaching for your trusted meat thermometer, only to be met with a baffling “Err” message or an inconsistent reading. A reliable meat thermometer is the unsung hero of countless delicious meals, ensuring everything from a perfectly seared steak to a safely roasted turkey. It’s an indispensable tool for preventing foodborne illness and achieving culinary perfection. When it malfunctions, it can throw your entire cooking process into disarray and leave you questioning the safety of your food. But don’t fret! Most common thermometer errors can be diagnosed and fixed with a little know-how. This comprehensive guide will help you understand the common pitfalls, interpret those cryptic error codes, and walk you through practical troubleshooting steps to get your meat thermometer back in top shape.
Meat Thermometer: Overview and Benefits
A meat thermometer is a device used to measure the internal temperature of cooked meat, poultry, and other foods. Its primary purpose is to ensure that food reaches a safe minimum internal temperature to destroy harmful bacteria, thereby preventing foodborne illness. Beyond safety, a good meat thermometer is crucial for achieving your desired level of doneness, whether you prefer your beef medium-rare or your chicken cooked through but still juicy.
There are several popular types of meat thermometers, each with its own advantages. Instant-read thermometers provide quick readings, making them ideal for checking the temperature of different parts of a large roast or thin cuts like steaks and burgers. Probe thermometers (also known as leave-in thermometers) are designed to stay in the meat while it cooks in the oven or on the grill, often featuring an external display unit that alerts you when the target temperature is reached. Smart thermometers take convenience a step further, connecting to your smartphone via Bluetooth or Wi-Fi, offering remote monitoring and cooking guides. Regardless of the type, the goal remains the same: precise temperature measurement for safe and delicious results.
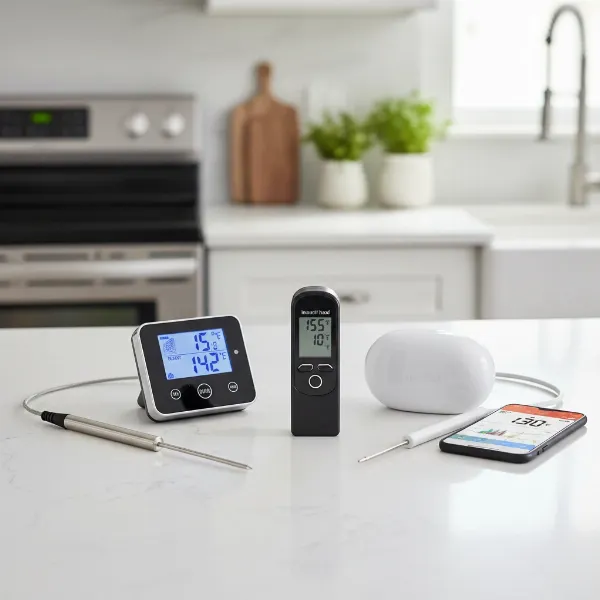 A variety of meat thermometers including instant-read, probe, and smart types on a kitchen counter.
Common Meat Thermometer Errors and Their Meanings
When your meat thermometer acts up, it often displays a code or behaves erratically. Understanding what these signals mean is the first step toward a solution.
- “Err” or “Error” Messages: This general error often indicates that the thermometer was unable to complete a temperature reading. Common causes include the sensor being too warm before activation, an incomplete reading due to quick removal, or a general internal problem. For ear thermometers (though less common for meat), blockage of the sensor can also trigger an “Err” message.
- “LLL” or “HHH” (or “HH”) Displays: These codes typically signal that the probe’s measured temperature is outside its operational range. “LLL” (Low, Low, Low) means the temperature is too cold for the device to read, while “HHH” (High, High, High) indicates it’s too hot. These can also appear if the probe is not fully inserted into its socket, or if the probe itself is damaged or shorted out.
- Inaccurate Readings: If your thermometer consistently gives readings that seem off, it’s often a sign of a calibration issue. Over time, thermometers can drift from their factory settings. Incorrect probe placement, such as touching bone, fat, or the bottom of a pan, can also lead to inaccurate measurements, as these elements conduct heat differently than the meat itself. A dirty or obstructed sensor can also hinder accurate temperature detection.
- No Display or Not Turning On: The most common culprit here is dead or low batteries. However, poor battery contact, internal damage, or a defective unit can also prevent the thermometer from powering up.
- Erratic or Inconsistent Readings: If your display jumps around wildly or provides highly variable readings within seconds, it could be due to a dying battery, moisture damage affecting internal components, or a fundamental internal fault with the device or probe.
Step-by-Step Guide to Troubleshooting Your Meat Thermometer
Facing an error can be annoying, but many issues are easily resolved with a few simple checks.
Check the Basics First
|
Our Picks for the Best Meat thermometer in 2026
As an Amazon Associate I earn from qualifying purchases.
|
||
| Num | Product | Action |
|---|---|---|
| 1 | TempPro TP829 1000ft Wireless Meat Thermometer Digital for Grilling and Smoking, 4 Meat Probes Grill Thermometer for Outside Grill, BBQ Thermometer for Cooking Food Temperature (Previously ThermoPro) |

|
| 2 | Professional Meat Thermometer - Instant Read Food Thermometer with Waterproof Design, Backlight, Hold/Min/Max Function - Cooking Thermometer for Grilling, BBQ, Kitchen Use |
|
| 3 | Ultrean Digital Meat Thermometer for Cooking,Ultra-Fast Instant Read Food Thermometer with Backlight,Foldable Probe,Waterproof Kitchen Thermometer for BBQ,Grill,Fry,Oven,Candy Making |
|
| 4 | 0.5 Sec Instant Read Meat Thermometer Digital with ±0.5℉ Precision, Food Thermometer for Cooking Kitchen Gadgets, Oven Grill Candy BBQ Essentials Accessories, Gifts for Him Dad Men Birthday, Red |
|
| 5 | ThermoPro TP03B Digital Meat Thermometer for Cooking, Instant Read Thermometer with Backlight, Kitchen Food Thermometer for Grill Smoker BBQ Oil Deep Fry Candy Bread Coffee with Pop-up Meat Probe |
|
| 6 | Meat Thermometer Digital with 1 Second Instant Read, Large LED Display, Food Thermometer |
|
| 7 | Alpha Grillers Meat Thermometer Digital - Instant Read Food Thermometer for Cooking and Grilling Gifts for Men Valentines Day Gifts for Him Her Mom Dad |
|
| 8 | ThermoPro TP19H Digital Meat Thermometer for Cooking with Ambidextrous Backlit and Motion Sensing Kitchen Cooking Food Thermometer for BBQ Grill Smoker Oil Fry Candy Instant Read Thermometer |
|
| 9 | Meat Thermometer Digital, Instant Read Meat ThermometerI for Grill and Cooking, Waterproof Food Thermometer for Kitchen and Outside, BBQ, Turkey, Candy, Liquids, Beef |
|
| 10 | Meat Thermometer Digital - Instant Read Food Thermometer for Cooking Grilling, Candy, Air Fryer, Griddle Probe Kitchen Gadgets Essentials BBQ Accessories, Valentines Day Gifts for Him Her, Red |
|
Before diving into complex solutions, always start with the fundamentals.
- Batteries: This is the most frequent cause of malfunction. If your thermometer isn’t turning on, displaying erratic readings, or showing “HH” (for some models), replace the batteries with fresh, high-quality ones of the correct type and voltage. While doing so, inspect the battery contacts for any corrosion or oxidation (a green or white powdery substance) and gently clean them with a cotton swab and rubbing alcohol if necessary. Ensure the batteries are seated correctly for proper contact.
- Connections: For probe thermometers with detachable probes, ensure the probe cable is fully and firmly inserted into its socket on the main unit. A loose connection can often lead to “LLL” or “HHH” errors, or no reading at all. Remove and re-insert the probe to ensure a secure connection.
- Cleanliness: A dirty probe or sensor can interfere with accurate readings. Food residue, grease, or debris can insulate the sensor, causing false readings. Always clean your probe thoroughly after each use, following the manufacturer’s instructions. Use a damp cloth with mild soap and water, then dry completely. Avoid immersing the main unit in water unless it’s explicitly rated as waterproof.
Calibration Check and Adjustment
Even new thermometers can be slightly off, and regular use can affect accuracy. Calibrating your thermometer ensures it’s providing precise measurements.
- The Ice Bath Method (Freezing Point): This is the most common and safest method.
- Fill a large glass completely with crushed ice.
- Add cold water until the glass is full, ensuring the ice floats. Let it sit for a few minutes.
- Insert your thermometer probe into the center of the ice water, making sure it doesn’t touch the sides or bottom of the glass. The probe tip should be submerged at least two inches.
- Wait for the temperature reading to stabilize, usually 30 seconds to 2 minutes. A correctly calibrated thermometer should read 32°F (0°C).
- The Boiling Water Method (Boiling Point): This method is also effective but requires more caution.
- Bring a pot of clean tap water to a rolling boil.
- Carefully immerse the thermometer probe into the boiling water, ensuring the tip is at least two inches deep and doesn’t touch the pot’s sides or bottom.
- Wait for the reading to stabilize (30 seconds to 1 minute). At sea level, a properly calibrated thermometer should read 212°F (100°C). Note that boiling point decreases at higher altitudes.
- Adjustment:
- Dial Thermometers: If your dial thermometer is off, look for a small hex nut or adjustment screw on the back of the dial. While the thermometer is still in the ice bath or boiling water, use a small wrench or pliers to turn the nut until the dial reads the correct temperature (32°F or 212°F).
- Digital Thermometers: Most digital thermometers cannot be manually adjusted. If an ice bath test reveals an inaccuracy outside its specified tolerance (e.g., ±1°F), you’ll either need to remember the offset (e.g., “add 2 degrees to the reading”) or consider replacing it if the error is significant and persistent. Some advanced models may have a reset or recalibration function; consult your user manual.
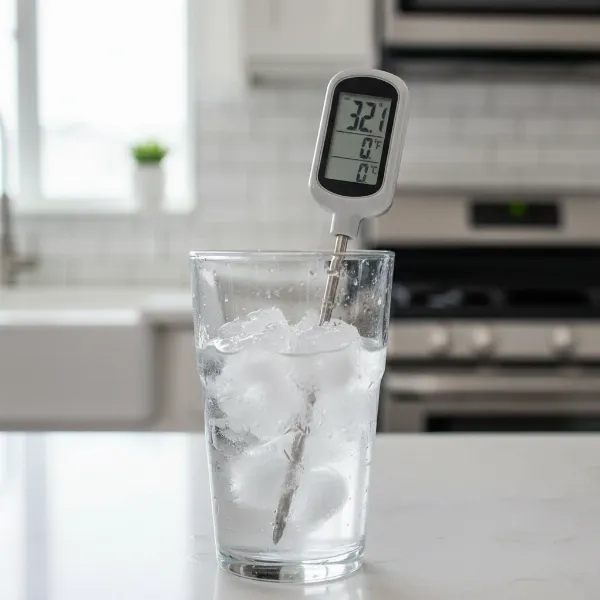 A digital meat thermometer probe submerged in a glass of ice water for calibration.
Correct Usage
Many “errors” stem from incorrect application rather than a faulty device.
- Probe Placement: For the most accurate internal temperature, always insert the thermometer probe into the thickest part of the meat, avoiding bones, fat, and gristle. These elements heat up or cool down at different rates than the muscle tissue, giving misleading readings. For thin cuts, insert the probe horizontally from the side.
- Allowing Time: Instant-read thermometers live up to their name, but even they need a few seconds for the reading to stabilize. Don’t pull the probe out too quickly. For leave-in probes, ensure sufficient time for the sensor to equilibrate with the meat’s temperature.
- Operating Range: Be mindful of your thermometer’s specified temperature range, both for the probe itself and the ambient operating conditions of the display unit. Exposing a probe to temperatures far beyond its design limits can cause permanent damage, resulting in “LLL” or “HHH” errors. Similarly, using the main unit in extreme heat (like inside a closed grill lid) can damage its electronics.
Resetting the Device
Sometimes, a simple reset can clear an internal glitch. For many digital thermometers, this involves removing the battery, waiting for at least one minute (or even five, as some recommend for a “hard reset”), and then reinserting it or a fresh one. Some models may have a dedicated reset button, often a small pinhole requiring a paperclip to press. Refer to your user manual for specific instructions for your model.
Inspecting for Physical Damage
Visually examine your thermometer and its probe. Look for:
- Bent or kinked probes.
- Frayed, cut, or exposed wires on probe cables.
- Cracks in the display screen or casing.
- Signs of moisture ingress (water droplets inside the display, fogging).
Any of these can indicate physical damage that might be causing errors.
Preventing Future Thermometer Errors
A little proactive care goes a long way in extending the life and accuracy of your meat thermometer.
- Regular Calibration: Make it a habit to calibrate your thermometer periodically, especially if you use it frequently or suspect it might be off. An ice bath test before a big cook is a quick and effective check.
- Proper Cleaning and Storage: Always clean your probe immediately after use to prevent food residue buildup. Store your thermometer in a clean, dry place, protected from drops and impacts. Many thermometers come with protective sheaths or cases; use them!
- Respect Temperature Limits: Understand your thermometer’s operational ranges. Avoid exposing probes to direct flames or temperatures far exceeding their maximum rating. Keep the main display unit away from extreme heat sources.
- Gentle Handling: While durable, thermometers are precision instruments. Avoid bending probes, yanking cables, or dropping the unit, as these can easily damage internal components.
- Consult the User Manual: This often-overlooked resource is packed with specific troubleshooting tips, calibration instructions, and care guidelines unique to your model.
When to Replace Your Meat Thermometer
Despite your best troubleshooting efforts, some thermometers simply reach the end of their useful life or sustain irreparable damage. It’s time to consider a replacement if:
- Persistent Errors: You’ve tried all troubleshooting steps, but the thermometer still displays errors or provides wildly inaccurate readings.
- Visible Irreparable Damage: The probe is severely bent, the wires are cut, the display is permanently cracked, or there’s clear water damage.
- Age and Wear: Like any electronic device, components degrade over time. If your thermometer is old and constantly acting up, a new one will save you future frustration.
- Beyond Economical Repair: For lower-cost models, the cost of a replacement probe or professional repair might exceed the price of a brand-new, more reliable unit.
Investing in a quality meat thermometer and maintaining it properly ensures years of precise cooking and peace of mind.
Meat Thermometer: A Culinary Essential for Perfect Results
A dependable meat thermometer is more than just a kitchen gadget; it’s a culinary partner that ensures safety and elevates your cooking to new heights. Mastering its use and knowing how to troubleshoot common issues empowers you to cook with confidence, consistently delivering perfectly done, delicious, and safe meals for yourself, your family, and your guests. From succulent roasts to perfectly grilled steaks, accurate temperature control is the key to unlocking the full potential of your ingredients.
In the world of cooking, precision matters. Don’t let a minor glitch in your meat thermometer derail your culinary ambitions. With the right knowledge and a few simple steps, you can keep your trusted tool operating flawlessly. What’s your go-to trick for keeping your meat thermometer in top shape?
Frequently Asked Questions
How often should I calibrate my meat thermometer?
It’s a good practice to calibrate your Meat Thermometer at least once a month if you use it frequently, or before cooking large, critical items like a holiday turkey. A quick ice bath test can confirm its accuracy in just a couple of minutes.
What does it mean if my meat thermometer reads “HHH”?
An “HHH” (or “HH”) reading typically means the temperature the probe is detecting is above its maximum measurable range, or there might be an issue with the probe itself, such as a short circuit or improper connection. Try re-inserting the probe, checking for physical damage, and ensuring the ambient temperature isn’t excessively high for the unit.
Can I use any battery in my meat thermometer?
Always use the specific type and voltage of battery recommended by the manufacturer in your thermometer’s user manual. Using incorrect batteries, or mixing old and new ones, can lead to inaccurate readings, poor performance, or even damage to the device.